Open topic with navigation
Creating a Custom Layer
You can design a custom ingredient layer manually or by importing a conditions file. When you design a custom layer, you are defining the ingredients by well, known as a condition, and the condition consists of one or more ingredients.
To create a custom ingredient layer:
- Go to the Design tab in the Experiment tab set.
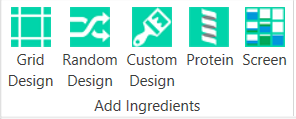
- In the Add Ingredients group, click the Custom Design button.
Add Condition List
- Drag the mouse over a group of wells to select them.
- On the Edit Custom Layer side panel that appears, type a descriptive name for the layer in the Name box.
- Select a target (well, drop 1, drop 2, etc.) from the Target list, and then type a new volume in the Volume box.
- Start adding ingredients to the first well: on the Conditions tab, select an ingredient type from the Type list.
- Select your ingredient from the ingredient list, then select the stock.
- Edit the concentration or pH as necessary.
- Click Add.
- To add another ingredient to the same well, click the
 button. Repeat steps 7-10 until you have added all ingredients to a condition.
 - Click the green plus sign to add a new condition, and repeat steps 7-11 until you have completed building the condition list layer.
Related Topics